After years of paying a butcher $150–$250 to process every deer and elk I killed, I finally took the plunge and set up my own home processing operation. Best decision I ever made. Not only did I save a pile of money, but I started actually knowing what was in my packages, how the meat was handled, and I could cut it exactly how my family likes it. If you've been on the fence about processing your own game, this guide will walk you through everything you need to get started.
The Equipment You Actually Need
You don't need a commercial kitchen to process a deer. Here's the basic setup that handles everything from a single blacktail to a full elk:
- Sharp knives: A 6-inch boning knife and an 8-inch breaking knife are your workhorses. Keep them sharp — dull knives cause accidents and tear meat. I use a Victorinox boning knife and sharpen it before every animal.
- Gambrel and hoist: Hanging the animal makes everything easier. A sturdy gambrel with a block-and-tackle setup in your garage works great.
- Meat grinder: A decent electric grinder (LEM or Cabela's in the #8 or #12 range) handles burger, sausage, and anything else you want to grind. Don't cheap out here.
- Vacuum sealer: Prevents freezer burn and extends shelf life significantly. A chamber sealer is ideal but a FoodSaver works for most home needs.
- Cutting boards: Large food-grade plastic boards, easy to sanitize.
- Bone saw or reciprocating saw: For splitting the pelvis and caping out if needed.
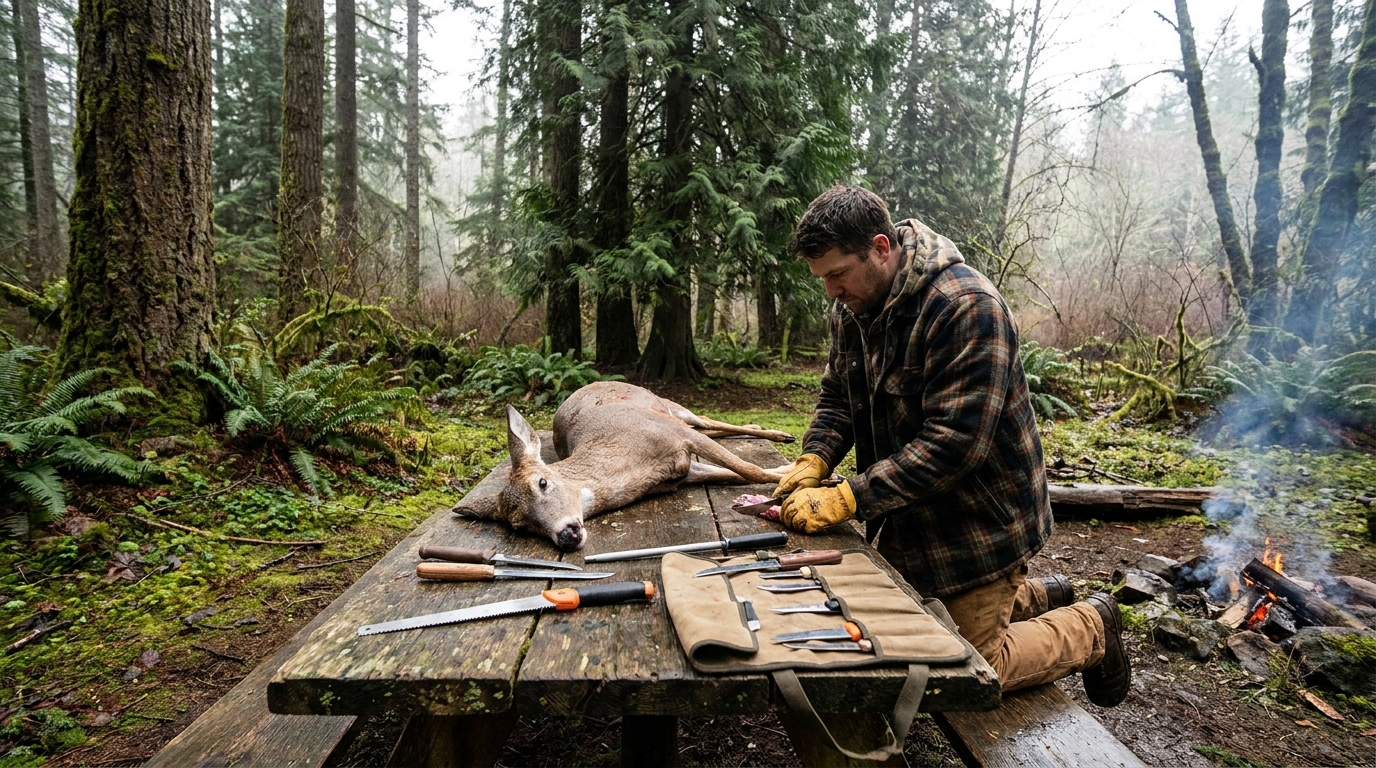
The Quartering and Breakdown Process
I do all my field prep the way I learned in the backcountry: quarter the animal on the bone, get it cool fast, and finish the processing at home. Once the quarters are hanging in a cool garage (under 40°F), I work through them methodically:
Hindquarters: Break down into the four main muscle groups — top round, bottom round, eye of round, and sirloin tip. Remove silverskin as you go. These are your steaks and roasts.
Front shoulders: More connective tissue, great for slow-cooking as roasts or grinding. I keep the shoulder whole for chuck roasts on a deer, or cut into stew meat.
Backstraps: The premium cut. I butterfly mine or cut into medallions. These never see the grinder.
Tenderloins: Field-removed or taken out at processing. Small but incredible. Pan-sear with butter and garlic, eat them same day.
Neck and trim: Into the grinder. Makes excellent burger, especially mixed 80/20 with pork fat if you prefer a richer grind.
Getting the Packaging Right
Label everything clearly: cut, date, species. Nothing is more frustrating than digging through a chest freezer looking for the backstraps you know are in there. I use a marker directly on vacuum bags. Roasts get a double wrap for extra protection. Most venison holds quality for 12–18 months in a good chest freezer at 0°F.
Temperature Control is Everything
The number one mistake home processors make is letting the meat get warm. Bacteria multiply fast above 40°F. Keep your processing room or garage cold, work in batches, and return cuts to the cooler or refrigerator if you're taking a break. Clean and sanitize your equipment between sessions with a food-safe sanitizer.
The first animal you process yourself will take twice as long as you expect. The fifth one will feel completely natural. Start with a deer before tackling an elk, and you'll be set up for a lifetime of knowing exactly where your food comes from.