Most pistol accuracy problems trace back to two root causes: grip and trigger technique. Fix these two things and your groups will tighten, your split times will improve, and your confidence with a handgun will increase dramatically. These are skills that require deliberate practice to build, but they're available to any shooter regardless of the pistol they carry or their previous experience level.
The Grip Foundation
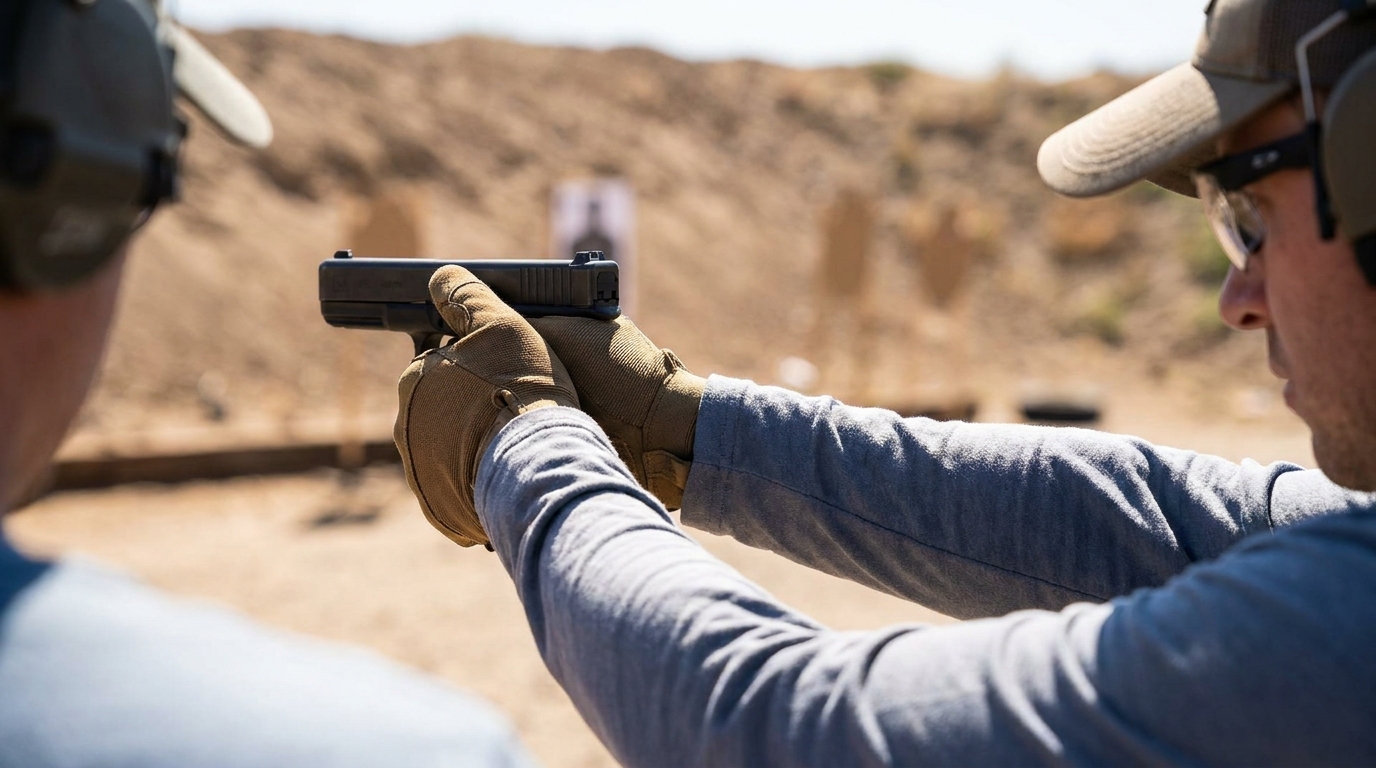
Your grip is your connection to the pistol, and it controls two things: where the muzzle points and how well you manage recoil for rapid follow-up shots. The fundamental goal is to get as much hand surface on the gun as possible while keeping your grip consistent from shot to shot.
Strong hand position: Your strong hand web should ride as high on the backstrap as possible, just below the beaver tail. This places the bore axis as close to your hand as possible, reducing muzzle flip. Wrap all four fingers around the grip; the trigger finger is straight and resting on the frame until you are ready to fire.
Support hand position: Your support hand fills in the gap on the strong side. The palm of the support hand covers the exposed grip panel on the strong side, with fingers wrapping under the strong-hand fingers. The heels of both hands should have very little gap. Apply 60–70% of your grip pressure with the support hand — this is counterintuitive but effective. The support hand clamps the pistol; the strong hand primarily provides trigger control.
Wrist and Arm Position
Both wrists should be slightly forward (canted in) to lock out the wrist joint and provide a rigid platform for the pistol to cycle against. A limp or excessively bent wrist is a leading cause of failures to feed or eject (limp-wristing) and is also harder to control under rapid fire. Push forward slightly with your strong hand while pushing back with your support hand to create opposing pressure — this tension dramatically reduces muzzle movement.
Trigger Technique
The trigger finger should contact the trigger at the pad of the distal phalanx (the first joint of the index finger) or the crease of the first joint, depending on your hand size and trigger guard geometry. The key is that the finger presses straight rearward without pulling the muzzle to the strong side (for right-handed shooters). If your groups consistently print right (for a righty), the likely cause is too much trigger finger or excessive tension in the strong hand — not the pistol.
Diagnosing Your Trigger Pull
Dry fire is the fastest diagnostic tool. Load a snap cap, assume your shooting grip, and press the trigger slowly while watching the front sight. If the sight dips left or right as the trigger breaks, you have a flinch or a pull. Work on slow, deliberate dry fire until the sight picture doesn't move as the hammer falls.
Building the Skill: Deliberate Practice
Range practice that doesn't include deliberate feedback won't build skill — it just reinforces whatever you're already doing. The most effective drill for grip and trigger fundamentals is the Bill Drill: six rounds at 7 yards as fast as you can keep all hits in the A-zone of a USPSA target. At first, slow down dramatically and focus on the fundamentals. Speed will follow naturally as the fundamentals become automatic.
Dry fire is the most underutilized tool in pistol training. Ten minutes of dry fire practice daily — focusing on sight alignment, grip consistency, and trigger press — will show measurable results within two weeks.
Get the grip right. Get the trigger right. Everything else in pistol shooting follows from those two fundamentals.